2 Jul 2025
By
Sam Mathews
0 comment(s)
How to Avoid Over-Saturation in DTG Pretreatment
Over-saturation in DTG (Direct-to-Garment) pretreatment happens when too much solution is applied to the fabric. This leads to issues like blurred prints, uneven ink adhesion, slower drying, and stiff garments. Here's how to prevent it:
- Apply the Right Amount: Use approximately 16–20 grams of pretreatment per shirt. Always test on a sample first.
- Match the Method to the Garment: Use a sprayer for larger garments and a roller for smaller areas, ensuring even coverage.
- Understand Fabric Differences: Cotton handles pretreatment better than polyester or blends, which are more prone to over-saturation.
- Dry & Cure Properly: Use a heat press at the recommended settings to remove moisture and ensure ink bonds well.
- Maintain Equipment: Regularly clean and calibrate sprayers and rollers to avoid uneven application.
Avoiding over-saturation ensures sharper, durable prints and a better feel for the garment. Proper handling, drying, and testing are key to achieving consistent results.
How to Avoid & Remove DTG Pretreatment Box Stains
How to Apply Pretreatment Correctly
Getting pretreatment right is crucial for achieving crisp, vibrant prints without over-saturating the fabric. The method you use, the amount applied, and ensuring even coverage all play a big role in the final print quality. Let’s break down the key steps and techniques to help you nail this process.
Spray vs. Roller Application Methods
When it comes to applying pretreatment, you have two main options: spraying or rolling. Each method has its own strengths and limitations, depending on the type of garment and the area you’re working with.
- Spray Method: This involves using a sprayer to apply the solution. It’s great for larger garments and provides precise control over how much solution you use and where it goes. However, it can lead to overspray and waste if you’re not working in a controlled space.
- Roller Method: This uses a high-density foam roller and is better suited for smaller items like bibs or baby clothes. While it’s handy for small areas, it’s less precise and can lead to uneven application or disturb the fabric’s fibres.
Here’s a quick comparison to help you decide:
| Aspect | Spray Method | Roller Method |
|---|---|---|
| Best for | Larger garments; most fabric types | Small items like bibs or onesies |
| Quality | Consistent and controlled application | Higher risk of uneven coverage |
| Precision | Excellent control over area and amount | Limited control; uneven spread likely |
| Drawbacks | Overspray and potential wastage | May pull fibres; risk of overuse |
| Recommendation | Ideal for most applications | Use sparingly for small areas |
How to Measure the Right Amount of Pretreatment
The amount of pretreatment you need depends on several factors like fabric type (cotton versus blends), colour (darker garments usually need more), and the specific pretreatment solution being used. As a general guideline, aim for 16–20 grams of pretreatment per shirt, but always test and adjust based on the thickness and type of fabric.
Here’s how to measure it effectively:
- Prepare the Fabric: Ensure the garment is clean and wrinkle-free. Any debris or creases can disrupt the even spread of the solution.
- Test First: Start by testing on a few sample garments. This helps you find the right amount without wasting materials.
- Apply Gradually: Begin with a smaller amount, as it’s easier to add more than to remove excess. Use a spray gun or pretreatment machine for even coverage.
Pretreatment is especially important when printing white ink on dark fabrics, as it helps the ink sit on the surface and adhere properly. While it’s not always necessary for light-coloured garments, applying pretreatment can enhance colour vibrancy and improve wash durability.
How to Apply Pretreatment Evenly
Once you’ve determined the right amount of pretreatment, the next step is ensuring it’s applied evenly. Uneven application can lead to poor print quality, so attention to detail here is key.
- Set Up Your Workspace: Lay the garment flat on a spray table to create a smooth, even surface. Any bumps or wrinkles can cause inconsistent coverage.
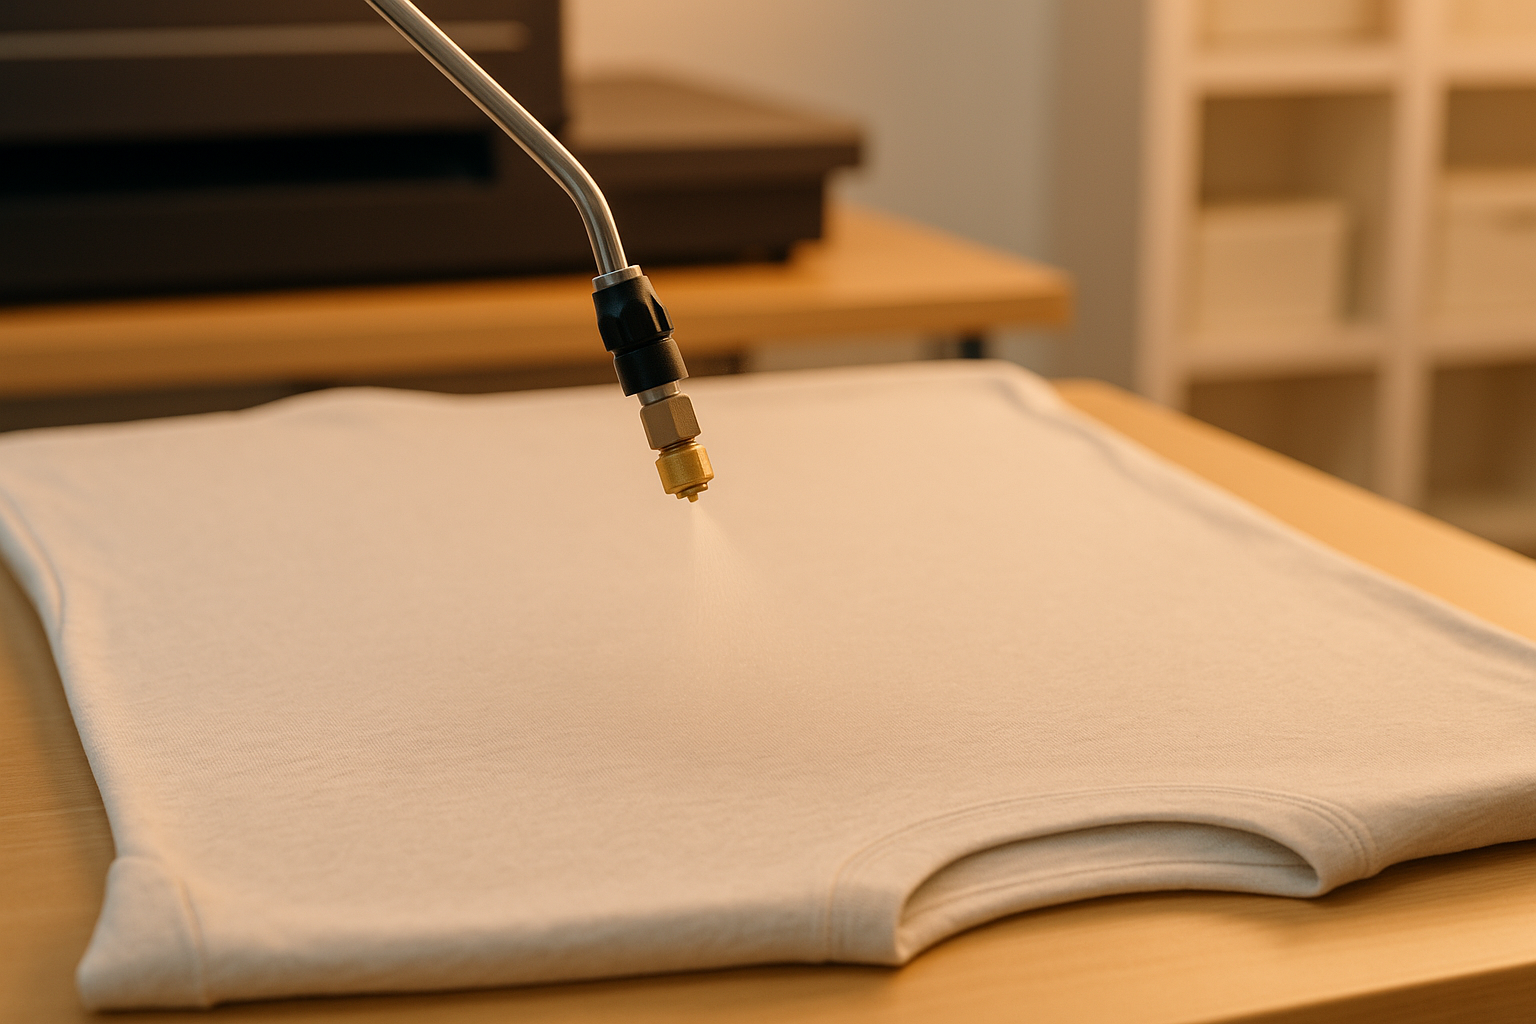
- Master the Technique: Spray an even layer of pretreatment over the print area. As RICOH DTG suggests:
"Apply the pretreatment mix with the sprayer, spread an adequate and even amount so that the material has an even, wet sheen. Remember that you only need to apply the pretreatment to the areas that will be printed on." [4]
- Use a Squeegee: After spraying, use a plastic squeegee to spread the solution evenly. Moving in one direction helps avoid pooling or dry spots.
- For Small Areas: If you’re working on smaller sections, like a baby onesie, a sponge roller can help you apply the solution more precisely.
- Minimise Handling: Once the pretreatment is applied, handle the garment as little as possible to avoid disturbing the solution. Pack pretreated garments carefully and press them before printing for the best results.
With time and practice, you’ll develop a feel for the right pressure, speed, and technique for different fabrics and setups. The goal is to achieve an even, wet sheen across the print area without any puddles or dry patches. This ensures your prints come out looking sharp and professional every time.
How to Dry and Cure Pretreatment Properly
After applying pretreatment evenly, the next step is to dry and cure it correctly. This process eliminates moisture and readies the fabric for ink, ensuring better adhesion and preventing print quality issues. Proper curing creates a surface that holds ink consistently, so your designs come out looking sharp and professional.
Heat Press Settings for Curing
The ideal temperature, pressure, and curing time depend on the type of pretreatment and fabric you're using. Start with the recommended settings and fine-tune based on test results.
Here are standard settings for common pretreatment solutions:
| Pretreatment Type | Temperature | Time | Pressure |
|---|---|---|---|
| Brother GTX Standard Pretreatment (100% Cotton and blends up to 50/50) | 180°C | 35 seconds | 75–80 psi (≈ 517–552 kPa) |
| DTG Poly Pretreat | 180°C | 20–30 seconds (or until steam stops) | 10–20 psi (≈ 69–138 kPa) |
For initial moisture removal, press pretreated t-shirts at 168°C for 15 seconds with light pressure, followed by another 15 seconds with heavier pressure [6].
Always use a protective sheet - like parchment paper, silicone sheets, or Teflon paper - between the fabric and the heat press. This keeps residue off your equipment. Replace these sheets after a few uses to avoid transferring old residue onto new garments [7][8].
Additionally, ensure your workspace is well-ventilated during curing, as vapours may be released during the process.
Pre-Pressing for Better Results
Pre-pressing garments before applying pretreatment helps smooth out wrinkles and remove any residual moisture. Heat press the entire area where pretreatment will be applied, not just the immediate print zone. This ensures the fabric is evenly prepared, which is especially useful for garments with textured surfaces or those that have been stored for a while. A smooth, prepped surface sets the stage for better ink application and high-quality prints.
How to Check for Complete Drying
Ensuring the pretreatment is completely dry is vital before printing. If it’s not fully dry, ink adhesion can suffer, while over-curing may damage delicate fabrics.
The easiest method to check is the touch test - the fabric should feel completely dry to the touch. Run your hand over the pretreated area; it shouldn’t feel damp, sticky, or cool. If it still feels wet, re-press it for a few more seconds until the moisture is gone.
For garments with large solid white ink areas, let the print air dry briefly after curing. This allows excess humidity to evaporate naturally, helping to avoid moisture-related issues [8]. If moisture persists, press briefly and pause to let steam escape before finishing the cycle [8]. Some operators use infrared temperature guns to confirm the fabric reaches the required temperature during curing.
On average, drying takes about 30–45 seconds to remove all moisture [8]. However, factors like fabric thickness, ambient humidity, and the amount of pretreatment applied can influence drying time. If unsure, it’s better to cure slightly longer than risk incomplete drying - but be cautious with heat-sensitive fabrics to avoid damage [9].
sbb-itb-410132b
How to Handle and Prepare Garments
Getting garments ready the right way is key to ensuring an even application of pretreatment. How you position and handle the fabric can make all the difference in achieving consistent absorption. Skipping this step or doing it poorly can result in areas that are either over-saturated or under-treated, which affects the final print quality.
How to Position and Prepare the Garment
Start by laying the garment completely flat. Wrinkles, folds, or bunching can create uneven surfaces where pretreatment might pool, leading to inconsistent coverage. To avoid this, pre-press the garment to remove any wrinkles and moisture. This step is also helpful in eliminating dust or loose fibres that could interfere with the process [2][1]. Make sure to press the entire area where pretreatment will be applied. Once done, secure the garment firmly on the printer's platen to prevent any movement during the application process [5][3]. Before proceeding, double-check that the garment is smooth and free of uneven spots.
For the best results, always align the preparation with the fabric’s natural grain.
Following Fabric Direction When Applying Pretreatment
Once the garment is properly positioned, work along the fabric’s natural grain. This ensures the pretreatment absorbs evenly across the surface. A clean and straightened fabric helps the solution penetrate uniformly without causing buildup in certain areas [1]. By applying the pretreatment evenly, you also prevent the ink from soaking too deeply into the fabric, allowing it to stay on the surface where it belongs [1].
Testing New Fabrics and Making Adjustments
When working with new fabrics, it's crucial to test them to avoid over-saturation [10]. A good way to measure pretreatment usage is by weighing the garment before and after application. Record the weight difference along with the spray area to standardise your usage for future applications [10]. Once pretreatment is applied, dry the garment as usual. During this step, check for signs like stains, crystals, or discoloration, which might indicate too much solution [10].
Next, print a test image that includes all DTG ink colours to evaluate the print quality. Look for issues like muddy colours, ink bleeding, or uneven coverage. After printing, wash the garment to assess its durability, as any pretreatment problems often show up after the first wash [10].
As FIREBIRD Ink suggests:
"Even when you are given settings to follow, you should perform tests to match your process with your shop's unique environment." [10]
Keep detailed records of your results. Note the amount of pretreatment used, the method of application, and how different fabrics respond. Tracking the grams of pretreatment applied per square inch for various image sizes can help you refine your process. Maintaining a reference chart for each fabric type will ensure consistent results and help you avoid over-saturation in the future.
How to Fix Common Problems and Prevent Issues
Keeping pretreatment quality consistent is just as important as ensuring proper application and drying. Regular checks can help you avoid common DTG pretreatment issues, which often arise from equipment inconsistencies, improper handling of the solution, or environmental factors that impact how the fabric absorbs the pretreatment.
How to Calibrate Equipment Regularly
Your pretreatment equipment needs regular upkeep to maintain consistent results. Spray nozzles, for example, can clog or wear out over time, leading to uneven application. This might result in some areas being over-saturated while others are under-treated. To avoid this, inspect spray patterns weekly using scrap fabric. If you notice streaks, gaps, or heavy spots, clean or replace the nozzles.
For roller systems, check the roller surfaces for any build-up or damage that could affect coverage. Make it a habit to clean the rollers thoroughly after every use, and replace them as soon as you see signs of wear.
A maintenance log can be a game-changer. By tracking when each piece of equipment was last serviced, you can catch potential problems early and avoid disruptions later.
How to Mix and Store Pretreatment Solution
Once your equipment is in good shape, turn your attention to the pretreatment solution itself. Proper handling is essential to ensure it works effectively. Pretreatment solutions are sensitive and can form sediment over time, which may lead to uneven coverage or over-saturation issues [11].
To keep the solution consistent, shake it daily for 1–2 minutes before use. For weekly maintenance, give the containers a more vigorous mix to ensure the particles are evenly distributed. If sediment has built up at the bottom, agitate the solution for about 5 minutes. For larger containers (up to 5 litres), a mechanical roller agitation system is ideal, but if that's not available, manually rolling the containers works too [11].
Storage is equally important. Keep the solution in a clean, dry area where the temperature stays between 10–40°C [11]. Since pretreatment liquids are sensitive to temperature and humidity [11], stable storage conditions will help maintain their effectiveness.
When working with different garment types, follow the recommended dilution ratios. For dark garments using white ink with Epson polyester pretreatment, avoid diluting with water [12]. For light garments using only CMYK inks, mix 1 part pretreatment liquid with 6 parts water [12]. Using incorrect ratios can lead to over-saturation or poor ink adhesion.
How to Control Your Production Environment
With your tools and materials sorted, focus on managing your production environment. Factors like temperature, humidity, and cleanliness can greatly impact pretreatment performance. High humidity, for instance, can slow drying times and cause the solution to spread unevenly. On the other hand, low humidity might cause the solution to dry too quickly, preventing proper absorption.
Maintain a workspace temperature between 20–25°C, and use dehumidifiers or air conditioning to regulate humidity levels, especially during the monsoon season when moisture can fluctuate significantly. A well-ventilated area not only ensures consistent results but also creates a healthier work environment [5].
Keep your workspace clean and free of dust, as airborne particles can settle on wet pretreatment and disrupt even coverage. Regularly cleaning your equipment and work surfaces will help prevent contamination that might affect absorption.
It’s also a good idea to monitor your results throughout the day. If prints from the same batch of fabric start showing inconsistencies, environmental factors could be the cause. Tracking such patterns can help you pinpoint and resolve issues before they escalate into bigger problems during production.
Summary and Next Steps
Key Points to Remember
Getting pretreatment right is crucial for achieving high-quality prints. Use the precise amount needed - too much can result in stiff, discoloured fabric (especially noticeable on lighter colours), while too little renders the process ineffective.
"Be sure to use the right amount. Doing so is critical – too much will make the shirt stiff and discolored (more evident in white to light-colored shirts), and too little can be like not using any at all" [13].
Regular maintenance of your equipment is just as important. Weekly checks of spray patterns and daily solution mixing can help avoid inconsistencies that lead to over-saturation or under-treatment.
Additionally, keeping detailed records of pretreatment quantities for different garments can help you identify the ideal balance for each fabric type [16]. These practices are integral to achieving the high standards of DTG printing that Custprint is known for.
How Custprint Ensures Quality in DTG Printing
Custprint combines decades of experience with precise techniques to deliver excellent DTG printing results. With over 40 years in the printing industry, we’ve perfected every step of the process, ensuring quality control by keeping all operations in-house - from pretreatment to curing - without relying on third-party vendors.
To guarantee consistency, we use automatic pretreatment machines. These machines apply the solution evenly, eliminating human error and preventing over-saturation. This ensures every product, whether it’s a t-shirt, hoodie, or polo tee, gets the perfect amount of pretreatment [15].
Our production facilities are designed to maintain consistent temperature and humidity levels, which is especially important given India's diverse climate. Regular calibration and maintenance of our equipment help us avoid issues like colour mismatches and misalignments that can disrupt DTG printing [14].
When you use our 'Create it' tool to design your custom apparel, you can trust that each product undergoes rigorous testing. We perform compatibility tests for various fabrics and subject our prints to wash tests to ensure they stand the test of time across our entire product range [14].
Whether you’re ordering one piece or a large batch, our streamlined four-step process - order placement, artwork proofing, manufacturing, and delivery - includes thorough quality checks at every stage. This meticulous attention to detail, paired with effective pretreatment methods, has earned Custprint a 4.6-star rating from thousands of satisfied customers across India.
FAQs
How can I spot and prevent over-saturation during DTG pretreatment?
Overdoing pretreatment during DTG (Direct-to-Garment) printing can cause problems like sticky residue, visible stains, or ink pooling on the fabric. You can spot over-saturation early by looking for signs like a wet or shiny surface, a sticky touch, or drying times that seem unusually long. These issues can also lead to prints that bleed or crack.
To avoid over-saturation, it's important to use the correct amount of pretreatment solution based on the fabric you're working with. Stick to proper spray techniques for an even coat, and make sure the fabric has enough time to dry. Handling the fabric gently after pretreatment is also crucial to preserve its quality and prevent any of these problems.
How does fabric type like cotton or polyester impact the amount of pretreatment solution required in DTG printing?
The type of fabric you’re working with directly influences how much pretreatment solution is required for DTG printing.
Cotton fabrics are highly absorbent, which means they tend to soak up more pretreatment solution to ensure the ink sticks properly. But here’s the catch - too much solution can lead to over-saturation, which might affect the final print. So, finding the right balance is crucial.
Polyester fabrics, on the other hand, are less absorbent. They need a smaller amount of pretreatment, but it must be a specially formulated one to handle their unique traits. One common issue with polyester is dye migration, where the fabric’s dye bleeds into the print if the pretreatment isn’t applied correctly.
For both cotton and polyester, the way you apply and dry the pretreatment can make all the difference. Proper spray techniques and drying methods help you achieve bright, sharp prints without risking over-saturation or other issues.
How can I maintain and calibrate DTG pretreatment equipment for consistent results?
To keep your DTG pretreatment equipment running smoothly and ensure consistent results, sticking to a regular maintenance routine is key. Begin by cleaning the machine daily after each use. Pay special attention to wiping down metal surfaces to clear away any leftover pretreatment solution. This simple step helps prevent buildup that can cause uneven spraying.
Additionally, make it a habit to calibrate the spray nozzles and pressure settings from time to time. Proper calibration ensures the pretreatment is distributed evenly. Check the user manual for detailed instructions and recommended maintenance intervals. By combining regular cleaning and calibration, you can avoid problems like over-saturation or patchy coverage, guaranteeing a flawless finish on your fabrics every time.