6 May 2025
By
Garima Kumari
0 comment(s)
5 Steps to Create Perfect Custom Polo Shirts for Teams
Want to design custom polo shirts for your team? Here’s how you can do it in 5 easy steps:
- Pick the Right Fabric: Choose based on your team's needs. Cotton for office teams, polyester for service staff, and moisture-wicking pique for sports teams.
- Create Your Design: Add team colours and logos strategically. Use mock-ups and keep designs clean and proportional.
- Choose a Printing Method: Screen printing for bold designs, embroidery for a polished look, or DTF for intricate details.
- Get the Right Fit: Measure team members accurately and select the fit style - regular, modern, or athletic.
- Set Your Timeline: Plan 6–8 weeks ahead to avoid delays. Account for material availability, design complexity, and order size.
Quick Overview
| Step | Key Action | Why It Matters |
|---|---|---|
| Pick the Right Fabric | Match fabric to purpose (cotton, polyester, etc.) | Ensures comfort, durability, and suitability for activities |
| Create Your Design | Add logos and colours strategically | Builds team identity and professionalism |
| Choose a Printing Method | Select screen printing, embroidery, or DTF | Affects durability and design quality |
| Get the Right Fit | Measure sizes and pick a fit style | Ensures comfort and a polished look |
| Set Your Timeline | Plan production and delivery | Avoids delays and ensures timely delivery |
Start early, pay attention to details, and your team will stand out with stylish, custom polo shirts that fit perfectly and look professional.
The EASIEST way to print Polo's, & Professional Wear ...
Step 1: Pick the Best Fabric
Selecting the right fabric is crucial for ensuring comfort, durability, and effective moisture management, especially given India's diverse climate. Here's a breakdown of popular fabric choices and their ideal uses.
Common Fabric Options
Here’s a quick comparison of fabrics to help you decide:
| Fabric Type | Best For | Key Features | Ideal Usage |
|---|---|---|---|
| Cotton | Office Teams | Soft, breathable, gentle on skin | Air-conditioned environments |
| Polyester | Service Staff | Stain-resistant, wrinkle-free | Spill-prone settings |
| Poly/Cotton | School Teams | Comfortable, easy to maintain | Daily uniform wear |
| Pique | Sports Teams | Moisture-wicking, durable | Outdoor activities |
| Jersey | Event Staff | Lightweight, flexible | Indoor events |
Match Fabric to Team Purpose
Different teams have different needs. Here's how to align fabric choices with specific requirements:
- Corporate Teams: Opt for 100% cotton for a polished look and natural breathability, perfect for air-conditioned offices.
- Sports Teams: Pique fabric stands out with its durability and moisture-wicking properties, ideal for outdoor games.
- School Uniforms: A poly/cotton blend offers the right balance of softness and durability for everyday use.
- Outdoor Teams: Polyester or poly/cotton blends work well in hot conditions, thanks to their moisture-wicking capabilities.
Fabric Recommendations for Specific Conditions
Here are fabric suggestions tailored to particular conditions:
| Condition | Recommended Fabric | Why It Works |
|---|---|---|
| High Humidity | Pique or Polyester | Excellent moisture-wicking |
| Extended Wear | Poly/Cotton Blend | Holds its shape, easy to maintain |
| Formal Settings | Pure Cotton | Provides a professional look |
| Active Movement | Jersey or Pique | Flexible and durable |
For summer, go with lighter fabrics to stay cool. Medium-weight fabrics work better for air-conditioned spaces, offering just the right balance of comfort and warmth.
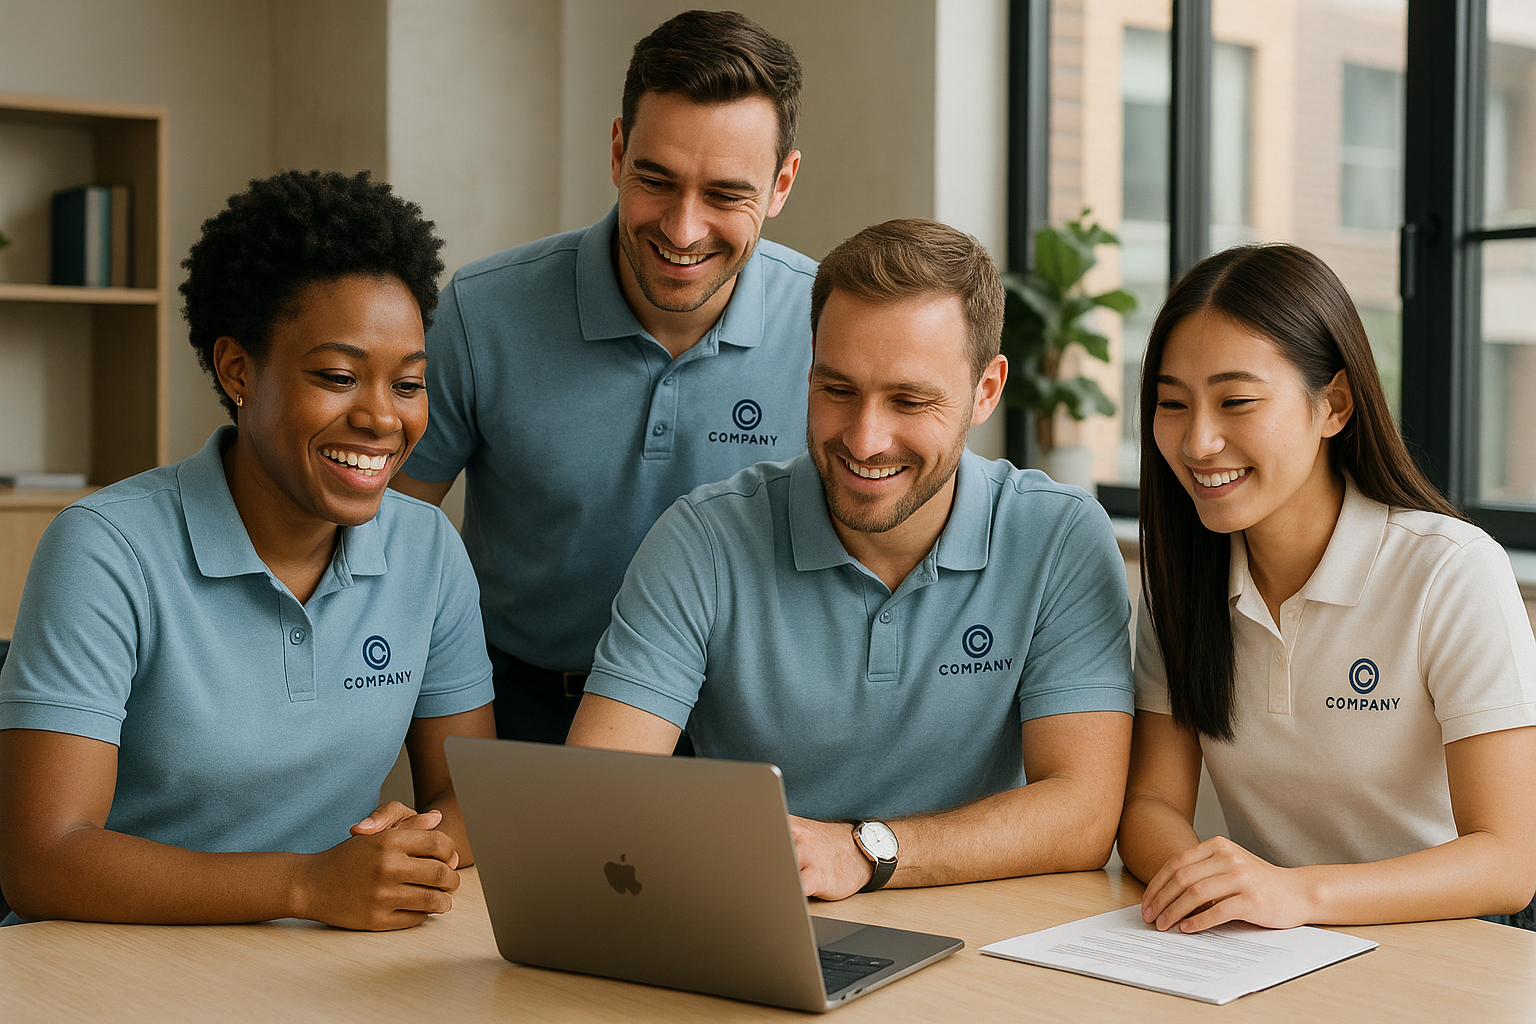
Step 2: Create Your Team Design
After choosing the fabric, the next step is to craft a team design that brings your custom polo shirts to life. By carefully placing logos and other elements, you can achieve a polished and cohesive look for your team.
Add Team Colours and Logos
Start by selecting the right logo style and placement. Use the table below as a guide:
| Placement | Recommended Size | Best For |
|---|---|---|
| Left Chest | 2.5 to 4 inches wide | Corporate teams, formal wear |
| Right Chest | 2.5 to 4 inches wide | Alternative professional look |
| Sleeve | 2 to 3 inches wide | Sports teams, active wear |
| Back | 6 to 10 inches wide | Event staff, promotional wear |
| Collar | 1 to 1.5 inches wide | Premium branding |
Tone-on-tone logos and embroidery offer a clean, modern finish, making them a great choice for corporate settings. Once you've finalised your colours and logo sizes, think about their placement to make the biggest impact.
Place Design Elements
Strategic placement is key to ensuring your design is clear and visually appealing. For example, the left chest works well for corporate teams, sleeves are great for sports teams (since they stay visible during movement), and the back is ideal for event staff.
"Customisation is vital to a strong brand identity, and polo shirts offer an excellent canvas for this." - Garment Printing Blog
To achieve the best results, keep these tips in mind:
- Use mock-ups to test your designs
- Maintain proportional logo sizes
- Opt for durable printing techniques
- Avoid overcrowding your design with too many elements
Step 3: Choose Your Print Method
With your design ready, the next step is picking a printing method that ensures durability and a polished look. The right method can make all the difference, especially when creating team polo shirts that can handle India's varying climate. Each technique suits different needs, so choose wisely.
Screen Printing
Screen printing is a go-to option, especially for larger orders. It produces bold, vibrant designs by applying ink through mesh screens onto the fabric. For the best outcome:
- Use dark ink or an under-base to prevent colour bleeding.
- Maintain a temperature of 162.8°C (325°F) for proper bonding.
- Opt for plastisol ink with a nylon hardener to enhance durability [2].
Embroidery
Embroidery involves stitching the design directly into the fabric, giving the shirts a polished and long-lasting finish. It works best with simple designs to ensure clarity and a professional appearance.
DTF Printing
Direct-to-Film (DTF) printing is ideal for intricate, photorealistic designs. It offers excellent detail without needing an under-base and creates prints that resist cracking [1].
To ensure DTF prints stay in top condition under Indian conditions:
- Wash in cold water.
- Turn shirts inside out before washing.
- Avoid ironing directly on printed areas.
- Skip tumble drying to preserve the print.
Select the printing method that aligns with your team's needs, factoring in design complexity, order size, and how often the shirts will be used.
sbb-itb-410132b
Step 4: Get the Right Size and Fit
Getting the right fit is crucial - it ensures comfort, consistency, and a polished look for your team.
Measure Team Members
Accurate measurements are key to choosing the correct sizes. Here's how to measure properly:
| Measurement | How to Measure | Important Note |
|---|---|---|
| Chest | Wrap the tape around the widest part of the chest | Keep arms relaxed |
| Shoulder | Measure across the back from one shoulder point to the other | Use a straight line |
| Sleeve | Measure from the wrist to the shoulder point | Keep the arm slightly bent |
| Length | Measure from the collar to the hem | Measure along the centre back |
Refer to this standard Indian size chart for guidance:
| Size | Chest (cm) | Shoulder (cm) | Half Sleeve (cm) | Length (cm) |
|---|---|---|---|---|
| S | 91-97 | 44.5 | 17.8 | 66 |
| M | 97-102 | 47 | 19.1 | 68.6 |
| L | 102-107 | 48.3 | 20.3 | 71.1 |
| XL | 107-112 | 50.8 | 21.6 | 73.7 |
| XXL | 112-117 | 53.3 | 22.9 | 76.2 |
Double-check team sizes and product details, as sizing can vary by brand or cut [3]. If you're placing a bulk order without individual measurements, a common size distribution is 30% Medium, 40% Large, and 30% Extra Large. Accurate measurements help ensure the best fit for everyone.
Pick Your Fit Style
Choosing the right fit style is just as important as the size. Different styles suit different needs and body types:
Regular Fit
- A straight-cut design that’s comfortable and works for most occasions.
Modern Fit
- Slightly tapered at the waist for a stylish, tailored look.
- Ideal for those with a lean or athletic build.
Athletic Fit
- Offers a snug fit without restricting movement.
- Perfect for sports teams or active roles.
The fit of a shirt impacts comfort, appearance, and practicality for various body types and events [4]. Fabric also plays a role - cotton polos usually stick to standard sizing, while performance fabrics like DRI-FIT may feel tighter [3]. Ordering a sample shirt to check the fit before committing to a bulk order is always a smart move.
Step 5: Set Your Timeline
To ensure you receive your shirts on time, plan your production timeline carefully. Custom orders involve several steps like artwork proofing, manufacturing, quality checks, and delivery. On average, standard production takes 4–6 weeks, though first-time orders can sometimes be completed in 2–3 weeks [7]. For more complex designs or larger quantities, production might stretch to 3 months [5].
Factors That Can Impact Your Timeline
Several elements can influence how long your order takes:
- Material Availability: If fabrics or other materials are out of stock, delays are likely.
- Design Complexity: Detailed prints or embroidery often require extra production time.
- Order Size: Bigger orders naturally take longer to produce.
- Seasonal Demands: Busy periods like Diwali or wedding season can slow down production schedules.
Staying on Track
To meet your deadlines, start planning 6–8 weeks in advance. It's also a good idea to order 10% extra to account for size variations or replacements.
Key Tips to Keep in Mind
- Be aware of local holidays and festivals that might delay production.
- Maintain regular communication with your manufacturer to stay updated on progress.
- For quicker turnaround, consider DTF printing, which can sometimes deliver results in as little as one week [6].
Good communication with your manufacturer is just as critical as choosing the right print method.
Conclusion: Order Your Team Polo Shirts
Now that the steps are laid out, it’s time to place your order. Designing custom polo shirts for your team can be simple when you follow an organised process. By tackling each part step by step, you’ll create a look that brings your team together under a unified image.
Planning and attention to detail are key. Start by ensuring the fabric meets your team’s needs in terms of quality and comfort. Incorporate team colours and logos into the design, and choose a printing method that suits your budget and timeline.
Pre-Order Checklist to Keep Handy:
- Fabric Check: Confirm the quality and weight of the fabric.
- Design Approval: Get the final artwork proof signed off by key members.
- Size Accuracy: Verify measurements for all team members.
- Timeline Review: Ensure the production schedule aligns with your deadlines.
Once these steps are done, your team will be ready to stand out in style. Check out Luxe Polo Cotton Tees starting at ₹399.00 for professional, budget-friendly team apparel.
FAQs
How can I make sure the custom polo shirts will fit all team members comfortably?
To ensure your custom polo shirts fit everyone comfortably, start by gathering size preferences from your team. If that's not possible, order a mix of sizes based on common distributions, such as medium, large, and extra-large.
Choose a fit that allows for comfortable movement, with enough room around the chest, shoulders, and arms. The sleeves should ideally reach halfway down the biceps for a polished look. Additionally, consider the fabric - cotton typically offers a snug fit, while polyester may feel more relaxed. Taking basic measurements like chest, waist, and shirt length can also help ensure a perfect fit for everyone.
What makes embroidery a better choice than screen printing for team polo shirts?
Embroidery is a great option for team polo shirts as it provides a premium and professional appearance, making it ideal for corporate logos or team emblems. The stitching creates a textured, three-dimensional effect that stands out and adds a high-end finish to the design.
Additionally, embroidery is highly durable and can withstand frequent washing and wear, ensuring that the design remains intact over time. This makes it especially suitable for long-term use, such as uniforms or team apparel.
How can I ensure my custom polo shirts are ready on time for an event?
To ensure your custom polo shirts are ready in time for your event, start by clearly defining your requirements, including the quantity, design, and budget. This will help streamline the production process.
Factor in production lead times, which typically range from 4 to 6 weeks depending on design complexity and material availability. For first-time orders, it’s a good idea to allocate an additional 2–3 weeks to account for approvals and adjustments. Confirm the timeline with your manufacturer when placing the order and always plan for potential delays.
If you're on a tight schedule, check if the manufacturer offers expedited production or rush delivery options. Being proactive and maintaining clear communication with the manufacturer can help ensure your shirts are delivered on time and meet your expectations.